How To Start a Tax Preparation Business From Home
If you’re the one that your friends and family call every tax season, you may have already thought about charging for that help. Or perhaps you’ve been working at a tax firm but would rather set your own hours and keep the full fee.
Whatever your reasons for looking into how to start a tax preparation business from home, it’s more doable than you might think (yes, even if you don’t have any finance-related background or any clients lined up yet).
Still, there are several important things you’ll need to sort out before taking on paying clients.
In this article, we’ll go over what you need to qualify, the tools to set up at home, and the steps to get your tax prep business up and running.
Do You Need a License To Start a Tax Preparation Business?
Well, the short answer here is that it depends on where you live.
In the U.S., you don’t need a federal license to prepare tax returns for pay. Instead, anyone who gets paid to prepare or help prepare federal returns needs a Preparer Tax Identification Number (PTIN) from the IRS, which you can apply for online.
That said, some states have other requirements besides the PTIN, such as registering with the state, completing a set number of training hours, or passing an exam. Your city or county may also require a general business license.
Outside the U.S., the rules vary from country to country. Some countries have no licensing requirement for tax preparers, while others require you to register with the tax authority or a professional body before you can charge for tax help.
So overall, you should check your country’s rules, plus any state or local ones, on both preparing taxes for pay and running a business from home.
How credentials change what you can do
Although you don’t need a credential to start preparing returns in the U.S., some credentials expand the work you’re allowed to take on. The biggest difference is in terms of representation, as in dealing with the IRS on a client’s behalf.
For example, if a client gets an audit notice or can’t pay a tax bill, a representative can handle the calls, paperwork, and negotiations for them. However, if you only have a PTIN, you can only prepare and file returns.
Enrolled agents (EAs), CPAs, and attorneys have unlimited representation rights, so they can represent any client on any tax matter.
Unlike the CPA and attorney routes, the EA credential focuses entirely on taxes and doesn’t require a college degree. You earn it by passing a three-part IRS exam and a background check.
Other countries have their own credentials, but the general rule is the same: More training and testing usually means you can take on more types of tax prep work.
How much tax knowledge you’ll need before taking clients
Even where there’s no license requirement, your clients are trusting you with something that has real consequences. A mistake on a tax return can mean a smaller refund, a surprise bill, or penalties and interest for your client.
Plus, in countries like Canada and the U.S., tax authorities can penalize preparers for certain errors on returns they sign.
At the very least, you should know how to handle the returns you plan to take on. For most individual returns, that means understanding common types of income (like wages, self-employment income, and investment income), filing statuses, deductions, and credits.
If you want to work with freelancers or small business owners, you’ll also need to know how business income and expenses are reported.
Keep in mind that tax laws change every year, so training isn’t a one-time thing. Plan to set aside time before each tax season to catch up on what’s new.
So, it helps to decide early on which returns you’ll take and which ones you’ll refer to someone else (like complex business returns or estates) until you’ve gained more experience.
What You’ll Need To Run a Tax Prep Business From Home
Since you won’t have an actual office for clients to visit, most of your setup is about working with clients remotely and keeping their information secure.
Here are the tools and workspace basics you should have in place beforehand:
- Professional tax software: Look for one that handles the types of returns you plan to prepare, including any state or regional returns, and lets you e-file. Cloud-based software works on any computer with an internet connection, while desktop software is installed on one machine.
- Dedicated workspace with set hours: Choose a spot where you can take client calls without interruptions and keep paperwork away from the rest of the household. Set your working hours, too, and share them with clients so they know when to expect a reply.
- Secure file-sharing and e-signature tools: A client portal lets clients upload their tax documents straight to you, which is safer than sending them by regular email. Pair that with an e-signature tool so clients can sign forms without having to print anything or come over.
- Separate business phone number and email: These keep client calls and messages apart from your personal ones. A virtual phone number app lets you use your current phone without giving out your personal number.
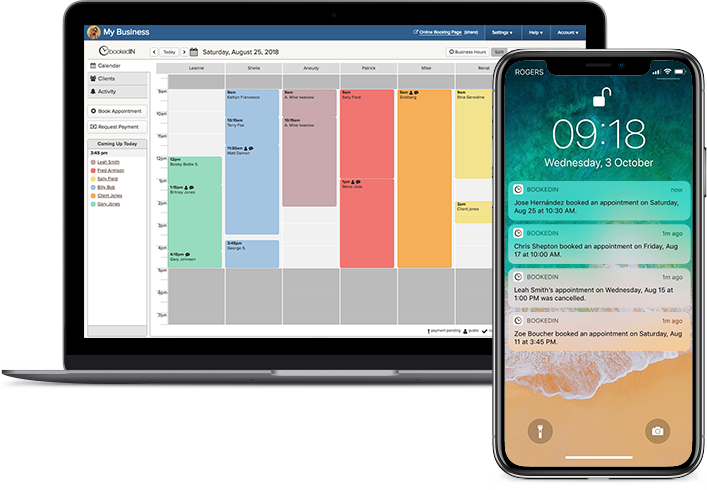
- Client scheduling system: With a tool like Bookedin, clients can pick a time for a consultation, document drop-off, or review meeting from your online booking page. You can also add custom booking fields to gather details up front.
10 Steps To Start a Tax Preparation Business From Home
The exact requirements and processing times depend on where you live. So, use the steps below as a general guide (not an exact checklist), then double-check what applies to you before you get started.
1. Get training on tax prep basics
As mentioned in a previous section, you’ll need to know the returns you plan to prepare before you start charging for them.
One way to get there is a tax preparation course, which you can find online and through tax schools, community colleges, and tax software companies. In fact, many are designed for beginners with no accounting background.
Volunteering is another option, and it gives you hands-on practice with real returns.
In the U.S., the IRS’s Volunteer Income Tax Assistance (VITA) program offers free tax law training and certification. Volunteers then prepare returns for people in their community. Other countries have similar volunteer programs, too.
If you’d like to earn money while you learn, consider working a season at a tax firm or tax prep chain. You’ll see how a busy season runs, from client intake to filing, and get used to the kinds of questions clients tend to ask.
2. Apply for a PTIN (U.S. only)
In the U.S., you need a PTIN before you prepare federal returns for pay, even if you only plan to take on a handful of clients. You’ll also include your PTIN on every return you prepare.
You can apply for one via the IRS website, and most first-time applicants get their PTIN in about 15 minutes.
There’s a small fee, and PTINs expire on Dec. 31 each year, so you’ll need to renew yours before the next tax season starts. The IRS opens renewals each fall.
(If you live outside the U.S., check whether your country’s tax authority requires paid preparers to register or get an ID number of their own.)
3. Check the requirements for tax preparers in your area
Depending on where you live, your country may require you to register as a tax preparer, and your state, province, or region may add its own rules on top of that.
Those rules can include signing up with a licensing board, completing a set number of training hours, or passing an exam before you take on clients. Your city or local government may also require a general business license.
Since you’re working from home, check the rules on home-based businesses, too. Some areas require a permit to run a business from home or limit things like client visits, parking, and signage.
If you rent or live in a building or neighborhood with its own rules (like a homeowners association), check whether your lease or those rules restrict running a tax prep business from home.
Also, some rules apply based on where your clients are, not just where you live. If you plan to work with clients in other states, provinces, or regions, check whether you need to meet those places’ requirements, too.
There might be instances where a state or province requires you to register if you prepare tax returns for its residents, even if you’re based somewhere else.
4. Choose a business structure and register your business
Your business structure affects how your income is taxed, how much paperwork you’ll deal with, and whether your personal assets are protected.
In the U.S., two common choices for a solo business are a sole proprietorship and a limited liability company (LLC). Other countries have their own versions, like sole traders and limited companies.
A sole proprietorship is the simplest option. You and the business are legally the same, so there’s little to set up beyond any local registration or license. The downside is that your personal assets aren’t protected if the business owes money or gets sued.
An LLC takes more paperwork and comes with ongoing fees, but it separates your personal assets from the business’s debts and legal claims.
However, an LLC usually won’t protect you from claims over your own mistakes on a client’s return. (That’s where insurance comes in, which we’ll cover in Step 7.)
If you’ll operate under a name other than your own, register it as a “doing business as” (DBA) name with your state or county, or the equivalent where you live. That way, you can legally use the name on your website, invoices, and bank account.
5. Apply for an EFIN (U.S. only)
Once your business is set up, the next step is an Electronic Filing Identification Number (EFIN), which lets you e-file your clients’ returns with the IRS.
An EFIN is separate from your PTIN, and you’ll likely need both. If you expect to file 11 or more individual returns in a year, you’re generally required to file those electronically, and you can’t e-file without an EFIN.
To apply, create an IRS e-Services account and fill out the e-file application. The IRS then runs a suitability check, which can include your credit, tax compliance, and criminal background. And unless you’re a CPA, enrolled agent, or attorney, you’ll also need to get your fingerprints scanned.
The application is free, but approval can take up to 45 days. So, apply well before tax season to give yourself time to set up your tax software and e-filing before your first clients come in.
(Now, if you’re based outside the U.S., your country may have a separate registration for e-filing on behalf of clients, so check with your tax authority.)
6. Open a business bank account
A separate bank account keeps your business income and expenses in one place, apart from your personal spending.
That makes it easier to see how much your business is actually earning. Plus, when you file your own taxes, you won’t have to sort through personal statements to find business expenses.
For an LLC, a separate account also matters because mixing personal and business money can weaken the protection an LLC gives your personal assets.
Once you get that bank account opened, connect it to the payment app or service (like Stripe, Square, or PayPal) you’ll use to accept card and online payments. That way, client payments go straight into your business account.
7. Get the right business insurance
As mentioned in Step 4, an LLC usually won’t protect you from claims over your own mistakes. Professional liability insurance, also called errors and omissions (E&O) insurance, covers that gap.
If a client says an error on their return cost them money, this coverage can help pay for your legal defense and any settlement.
Meanwhile, if clients will visit your home-slash-workspace, look into general liability insurance as well. This one covers things like a client getting hurt on your property.
Also, check your homeowners or renters policy, since it may not cover business activities or the equipment you use for work.
Some tax preparers also add cyber liability insurance, which can help with the costs of a data breach, like notifying clients and recovering stolen information.
8. Set up a plan to protect client data
Tax returns hold some of the most sensitive information people have, from ID numbers to bank details and income. Because of that, tax preparers are a common target for identity thieves and hackers.
In the U.S., for instance, tax professionals must have a written information security plan. The plan spells out how you’ll protect client data and what you’ll do if there’s a breach, and the IRS offers a free template to help smaller practices write one.
However, even if your country doesn’t require you to have a data security plan, you should still consider writing your own. That way, you have a checklist to follow day to day and steps to take if client data is ever exposed.
Here are a few basics to include in your plan:
- Use a computer that’s only for work, not a shared family laptop.
- Turn on multifactor authentication for your tax software, email, and client portal.
- Use strong, unique passwords and a password manager to keep track of them.
- Secure your home Wi-Fi with a strong password, and avoid public Wi-Fi for client work.
- Encrypt your files and backups, keep paper documents in a locked cabinet, and shred anything you no longer need.
As previously mentioned, a client portal is a safer way to collect documents than regular email. So, ask every client to use it, even if they’d prefer to just email their files.
9. Decide on your services and set your prices
Start by choosing what kinds of clients you want to focus on. That could be individuals with simple returns, freelancers and gig workers, small business owners, or landlords.
It’s best to focus on just one or two groups (at least for now), so you can get really good at the returns they file instead of trying to learn every kind of return. It also makes marketing easier, since you’ll know exactly who you’re trying to reach and what they need help with.
Next, decide how you’ll charge for your services. Here are a few common pricing models:
- Flat fee per return: One set price for each type of return, which is easy for clients to understand
- Tiered packages: Prices based on how complex the return is, like a basic package for wage income only and a higher tier for self-employment or rental income
- Base fee plus extra forms: A starting price, plus an added charge for each extra form or schedule a return needs
- Hourly: Often used for bookkeeping, tax planning, or consulting; can also work for tax prep that’s hard to price up front (like a client with messy records or several years of unfiled returns)
To set your rates, look at what other preparers in your area or niche charge, then factor in how long each type of return takes you.
List your prices where clients can see them, like on your website or online booking page. Even if you only share starting prices, clients will know what to expect before they reach out.
10. Start looking for your first few clients
Your first tax prep clients will likely come from people who already know you, like friends, family, coworkers, and neighbors. Let them know you’re taking clients by sending a short message and posting on social media a few months before tax season starts.
Make sure to specify what kinds of returns you can help them prepare and how they can schedule a time with you. That way, people can reach out or recommend you without having to ask for the basic details first.
Since you work remotely, you’re not limited to clients in your area. Set up a simple website that lists your services, prices, and booking link. Put that website link everywhere people might come across you online, starting with your social media bios and email signature.
Finally, once tax season wraps up, ask the clients who were happy with your work to recommend you to others next time.
Also read: How To Get Clients Fast: 15 Tips for Service Businesses
Get Ready for Tax Season With Bookedin
If you want to take on clients this coming tax season, make sure you start setting things up at least three months ahead. Some steps (especially those that require approvals from a government office) take longer than you might expect.
So, pick the date you’d like to start taking clients, then work backward from it. Start with your training and any registrations that take a while to process.
While you wait for those, you can set up your tools and workspace and maybe even tell the people you know that you’re starting this kind of work. Of course, those first messages are easier to act on when people have somewhere to go next.
That’s where having a scheduling tool like Bookedin comes in handy.
Clients can pick a time from your online booking page, with an option to meet with you over Zoom. Plus, two-way calendar sync helps ensure that your client appointments won’t overlap with your personal plans.
FAQ About Starting a Tax Preparation Business From Home
About the Author

With over a decade of experience across startups, online publications, and agencies, Marcy is all about delivering content that connects brands with the audiences they're trying to reach.